Okay. Confession time. I LOVE books. I mean, I really, really, really love books. And stocking my classroom with quality books for my classroom is incredibly important to me. But what do you do with all of those books? How do you organize them so your students can find them and utilize your library? I’m going to share exactly how to organize your classroom library so it’s functional and easy to manage.
Watch my Facebook Live on this topic here.
Step 1. Getting Started
The first thing you’ll need is, well, books! Don’t have a lot of books? Let me give you a really great tip.
Two words: Yard. Sales. It’s almost yard sale season, and they are the perfect place to score boxes of books for really, really cheap.
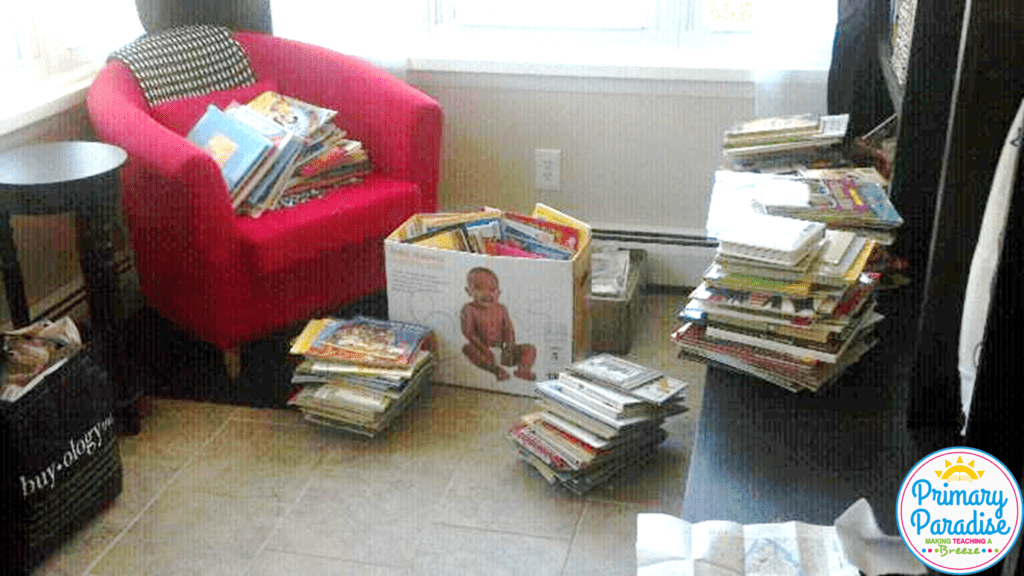
Now I have a classroom library with thousands of books. I have purchased 90% of them at yard sales, and the best strategy I’ve found is this. Scope out your local papers for yard sales each Friday night (most papers have an online yard sale section so you don’t even have to buy the paper). If there is a town that is having a town wide yard, you’ll definitely want to check it out. Normally there are so many people participating that people are willing to sell for cheap. If there’s not, look for clusters of yard sales so you’re not driving all over the place.
When you’re driving or walking around, look for people that have at least a box or two of books. If they only have a few books, they’ll probably expect too much for them. You want to find people either without price tags or who are asking 50 cents or less per book.
Look through what they have. If you’re interested in around 50% of the books, here’s what you do.
First, tell them you’re a teacher (seriously it works ;)) then say this “I’m trying to build my classroom library, so would you give me a deal if I buy all of your books?” 🙂 Normally they’re pretty excited. After all, you’re taking a ton of “junk” off of their hands. Wait for them to throw out a number, offer them a few dollars less, and bam. You just got a fabulous deal. I try to pay about $5 a box, but it depends on the quality and condition of the books.
Don’t worry if there are some old, gross, or weird books you don’t want. Just take them too. By buying all of them, you are more likely to get a better deal and save a ton of $. You can recycle or giveaway any books you aren’t interested in or you could pick a few of them as example books when you teach your students how to handle books. Discuss if they would want to read a book that looked like that, and then go into a dialog about to to treat books nicely. 🙂
Step 2. Organize
Now that you have your books, you can move on to step two, organizing your books. Think about what categories make sense for your classroom and the number of books you have. The greater number of books, the more categories you’ll need. I broke my books up into about 20 general categories to start.
General Fiction
Realistic Fiction
Fantasy
Dr. Seuss
Favorite Series
Adventure/Mystery
Fairy and Folk Tales
Morals and Lessons
Chapter Books
Poetry Art and Jokes
Phonics and Words
Leveled Readers
School
Math
Careers and Health
Holidays
Science
General Non-Fiction
A few of those categories are broken down even further. For example, all of my science books couldn’t fit in one basket, so I have Science-animals, Science-weather, etc.
If you aren’t sure what category to put a book in, Scholastic has a WONDERFUL Book Wizard Tool that I used. Just type in the title or author and it will give you a genre for the book.
Step 3. Keeping Track
After you have sorted your books into piles, you are ready to go to the next (and probably most important) step. Keeping track of your books. Now, this is the most tedious task, but I promise you, you won’t regret it. I recommend using excel, but you could also just make a word document. Make a spreadsheet for each category you came up with, and type in the title and author in alphabetical order. That way, when you want to know if you have a book about, say, the frog life cycle, instead of waiting to check when you get to school, you can just search your list on your computer.
Here is what mine looks like:
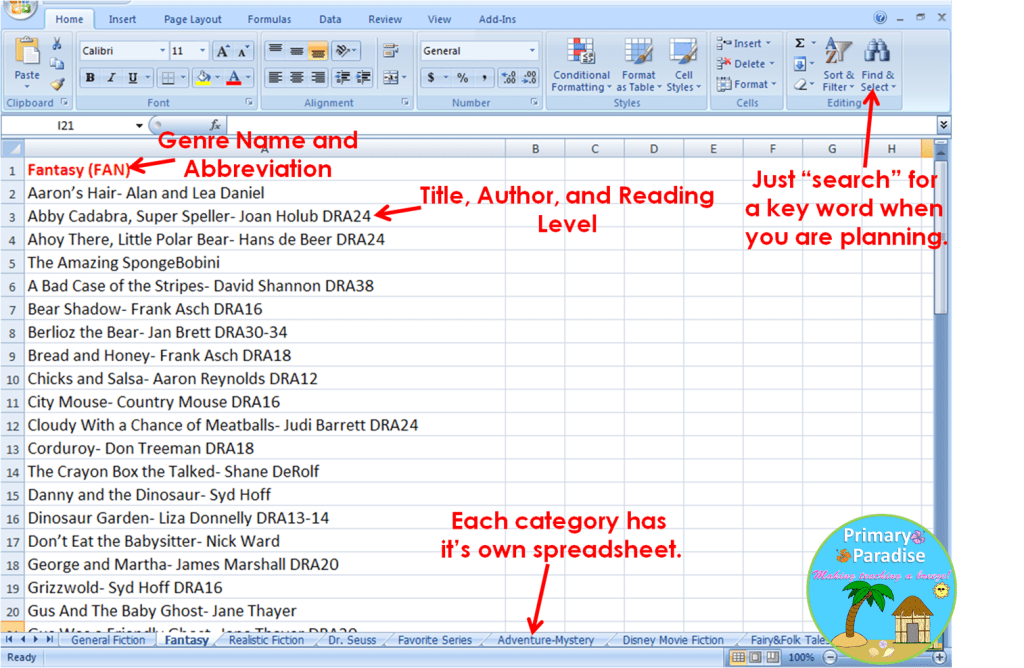
You, of course, should do what would work for you, but I have found that this is a pretty handy system. I’ve also emailed this to my colleagues so instead of asking me if I have a specific book, they can look on here and then just ask to borrow it.
Step 4. Storage
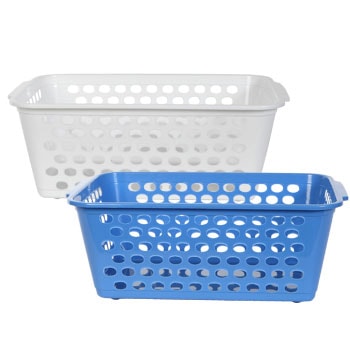
Before you go any further, you need to think about how exactly you’re going to store your books. If you’ve done all of this work, it simply doesn’t make any sense to just set them on a bookshelf because within a week they’ll be completely out of order. My suggestion is to use plastic baskets or bins. The bins I have are pictured below. They are from The Dollar Tree, and you can order them online. You have to order them in bulk orders of 36, but they’re $1 each and pretty durable. Just make sure you don’t try to jam too many books in each one, which is a lesson I learned after I cracked one. :-X Click the picture below to check them out.
Step 5. Label and Level
Now you’re ready for the part that actually feels like you’re getting something done! You are ready to label (and if you want to) level your books!
Remember those categories you used to sort your books into groups and entered in your excel spreadsheet? Well now they’re really going to come in handy. Take one category of books at a time. Let’s say you start with your general fiction books. I know I personally have hundreds of general fiction books, so they would never fit in one basket. I decided to split them up alphabetically by title into 4 baskets, so Fiction A-C was in one, Fiction D-J was in the second, Fiction K-P was in the third, and Fiction Q-Z was in the fourth.Obviously, it would depend on the books you have. You can clearly see that I had a lot of fiction books with titles starting with A-C, but not so many from Q-Z.
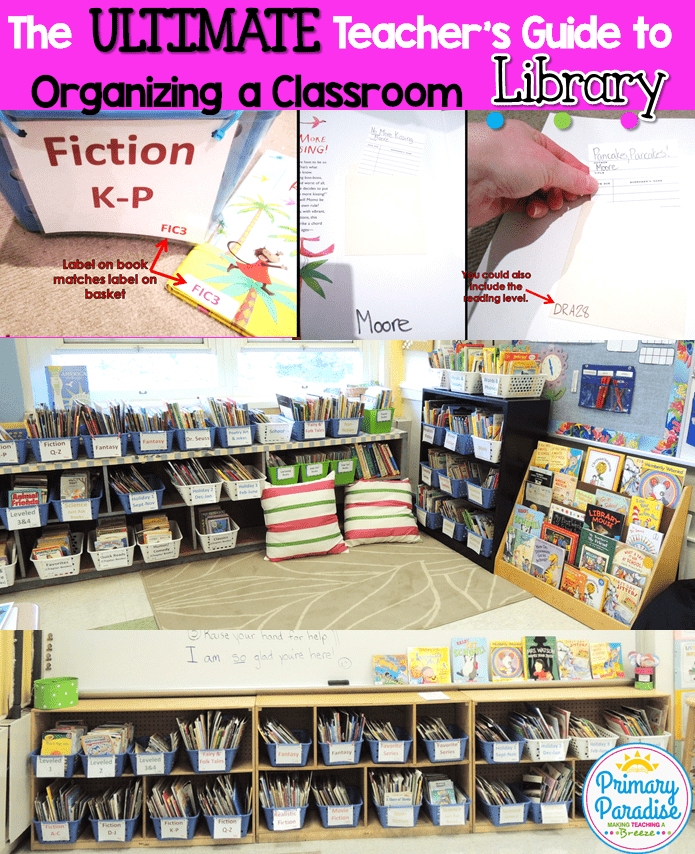
Now, You could easily label the books “Fiction A-C”, but I chose to give them abbreviations just in case I ever change that alphabetical range, so instead I gave each basket an abbreviation: “FIC 1”, “FIC 2”, “FIC 3”, and “FIC 4”. Here are what my labels look like.
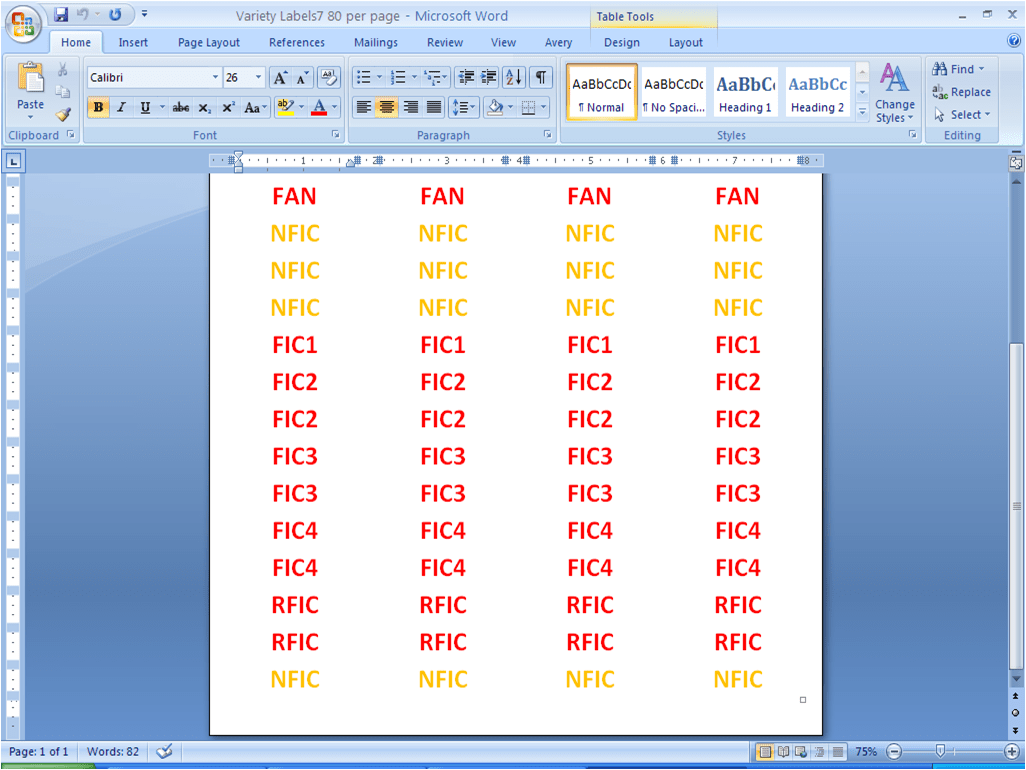
I just bought Avery return address labels and created them in word. If notice, all of the “FIC” labels are red. You also might notice you see “FAN” (fantasy) and RFIC (realistic fiction) labels are also red. All books that are Fiction have a red label. I color coded all of my labels to make it easier to identify the types of books. For examples, all of my non-fiction books are orange such as “NFIC” (general non-fiction) “S1″, S2”, “S1″, S2” (science 1,2,3,4), and “MA” (math). I would HIGHLY recommend color coding your labels as well. It makes it so easy for your students and for you to find and put back books.
As you’re sticking your label on each book, you might also want to use that Scholastic Book Wizard to write the level of your book inside the cover as well. You could also level them during step 3 when you’re typing them in your excel document.
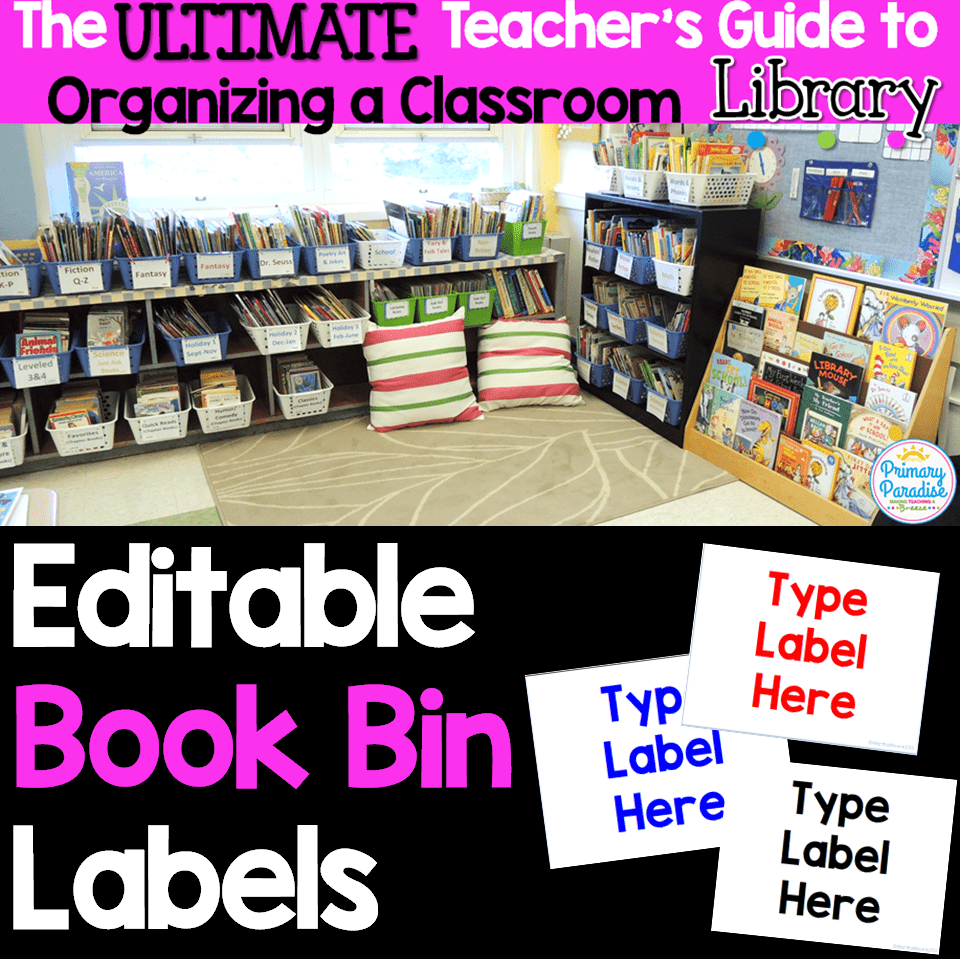
After you’re done labeling your individual books, you will need labels for your book bins. Click the picture below to check out the editable book bin labels that you can purchase from my TpT store.
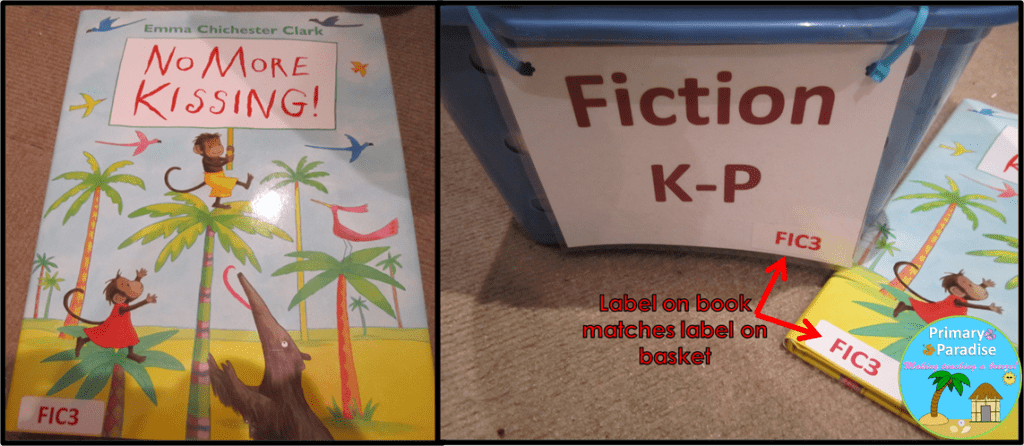
Tip: I would suggest putting one of your little book labels on each basket label as well like the picture below. It makes it much easier for your students to know exactly which bin to put their books in.
Step 6. Library Pockets and Cards
This last step is optional, but helps you really keep track of your books, so I would suggest taking the time to do it since you’ve already done all of this work. I would recommend putting a library pocket and card in the cover of each of your books. Why? It makes it so easy to see who has your book at any given time.
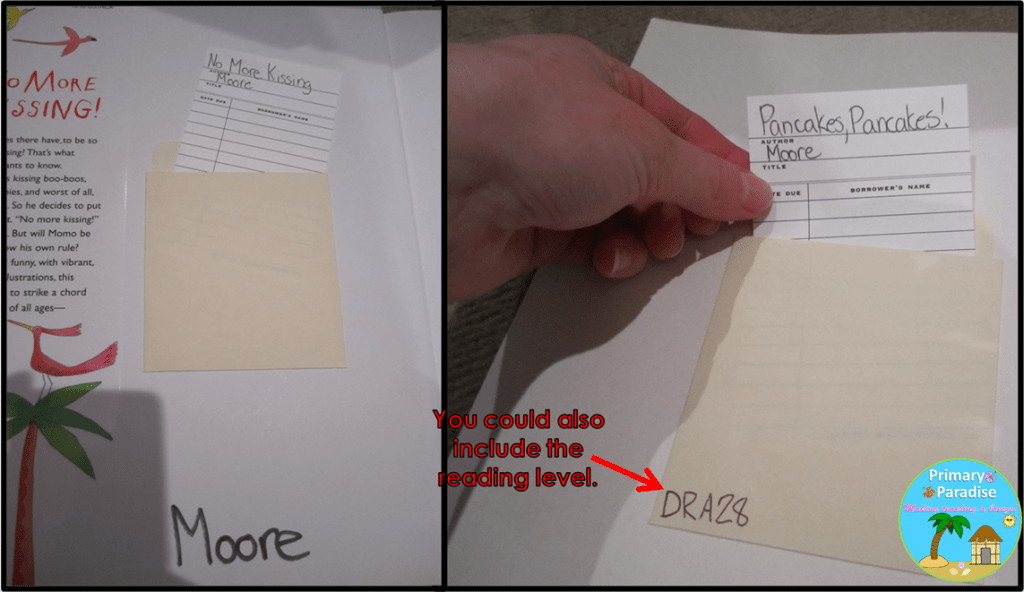
I purchase my library pockets and library cards in bulk from TheLibraryStore, and I would highly recommend purchasing from them. They have the best prices by far, have a huge selection (from self-adhesive, to colorful, to regular pockets), and ship very quickly. These are the pockets and cards I have, and I love them.
I also love having library pockets in my books because it makes tracking who has what books for Daily 5 super easy. I just made a check out chart for my wall, and the card for the books each student currently has goes in their pocket. Here are the two charts I made to go with my classroom themes each year.
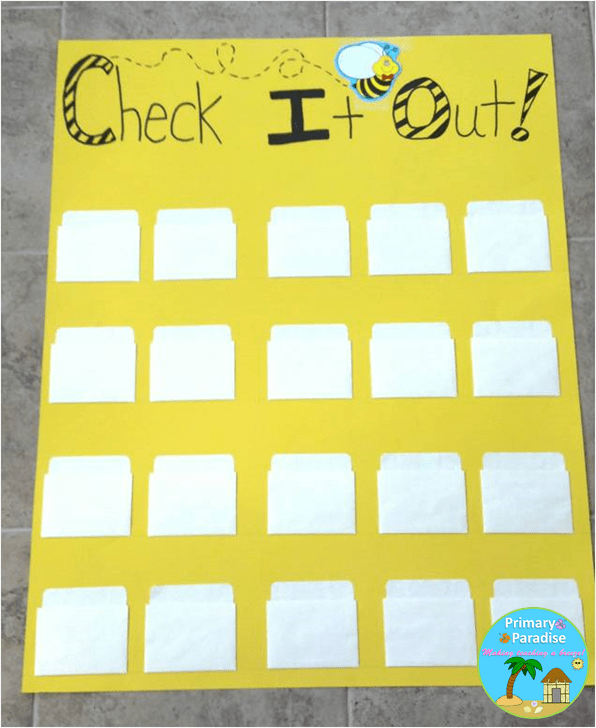
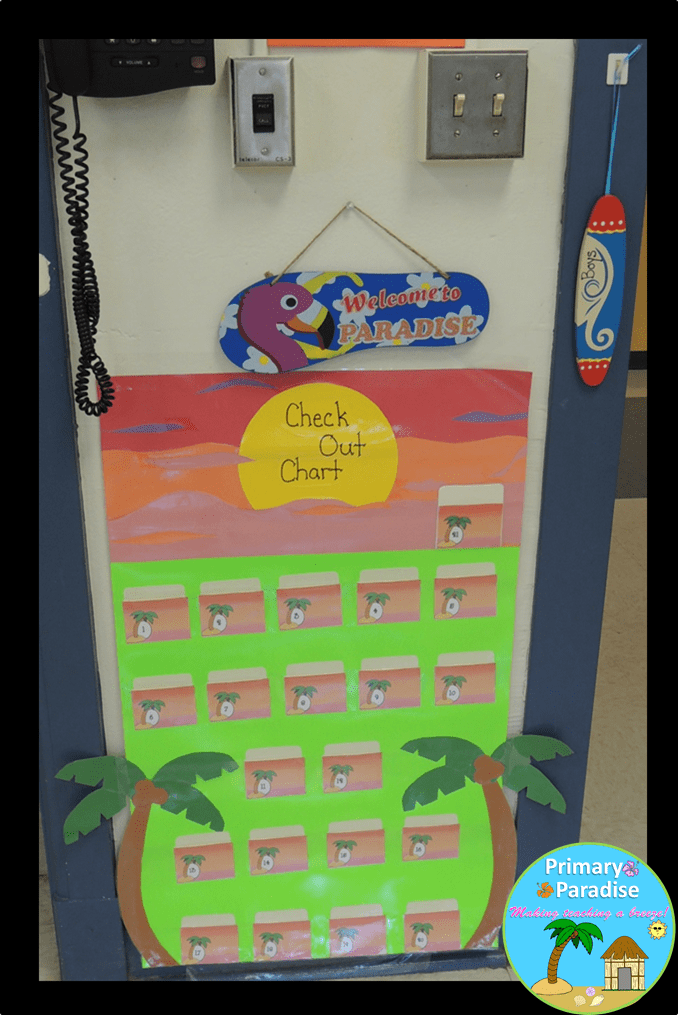
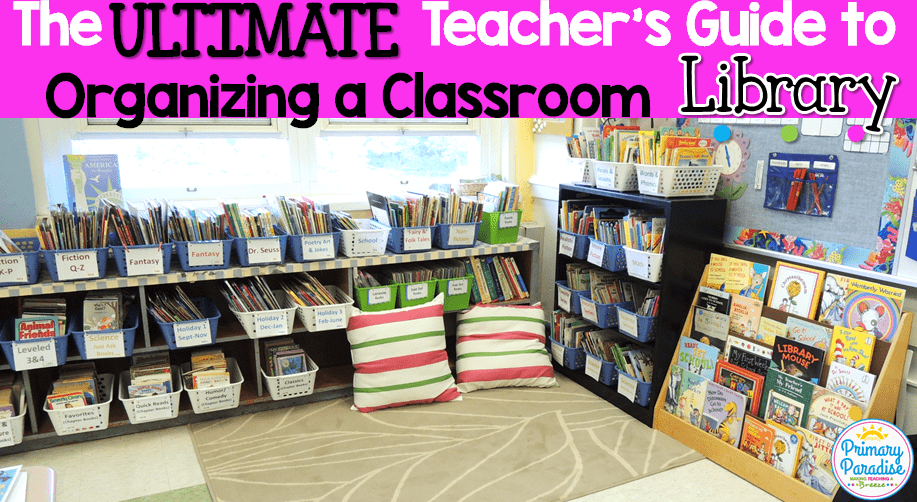
After all of that work, this is what my completed library looked like.
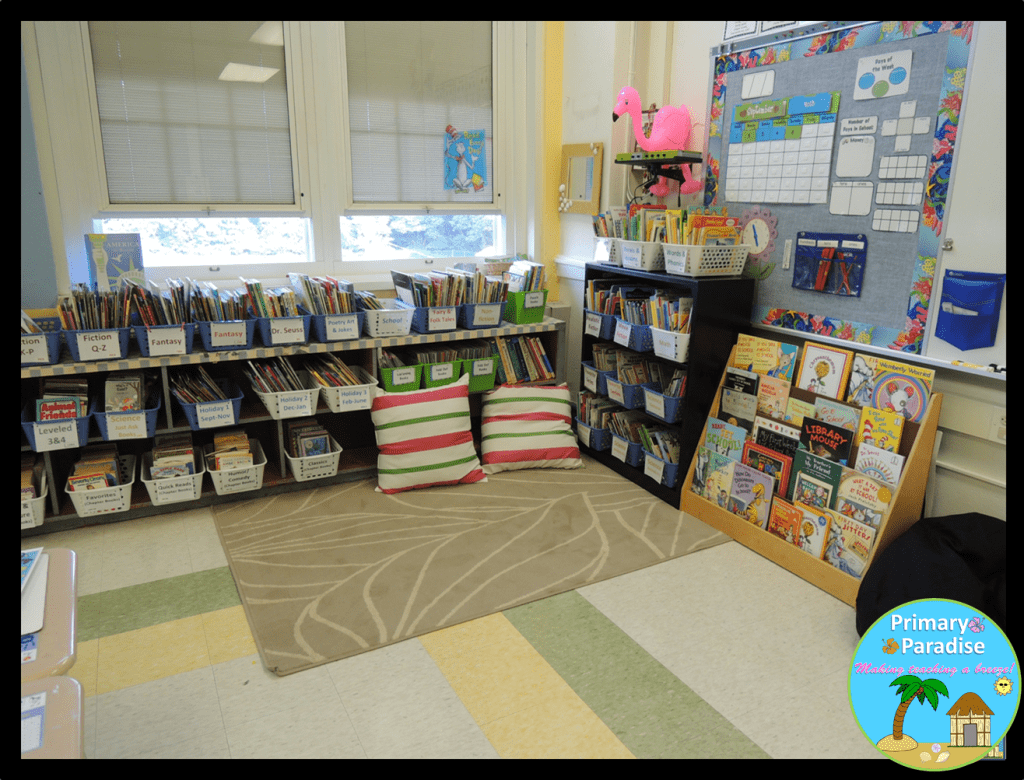
I should note, because I had such a huge number of books, it took me (almost) an entire summer to organize my library. Don’t worry if it takes you a while because once it’s completely organized, it’s wonderful! It’s also very easy to add new books to your collection using this system. Just sort, add it to your running excel sheet, level, label, add a library pocket, and put it in the correct basket. That’s it!
I hope this post was helpful. If you have any questions, comments, or suggestions for people who are working on organizing their classroom libraries, leave a comment below.
If you enjoyed this post, make sure to like, comment, and share! And don’t forget to subscribe to my newsletter for more ideas, tips, and freebies as well as access to my exclusive resource!
6 Comments
Comments are closed.