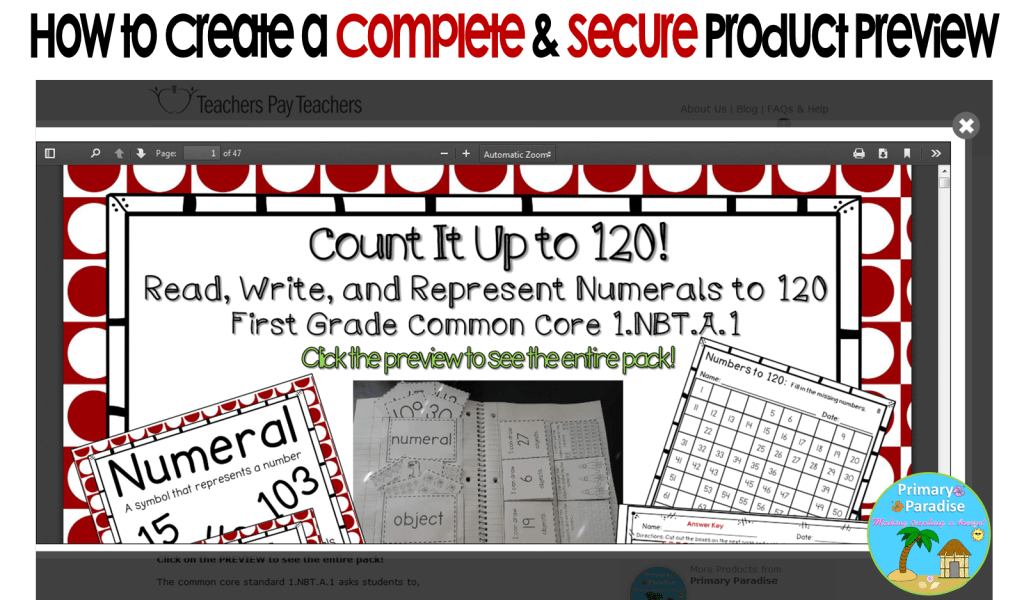
TeachersPayTeachers has become a staple in the teaching community, and for good reason. It’s a wonderful place to find fantastic resources to use in the classroom. I hear SO many great things about TpT from teacher friends. However, one of the frequent comments/complaints I hear about teacherspayteachers is that teachers want to be able to see the entire product before purchasing.
As a buyer, I can complete understand this. I mean, who doesn’t love to go to a book store and flip through a book before purchasing?
As a seller, my concern is that, if you post the entire preview, even as a secured PDF, there are programs out there that would allow people to work around those security features. So, I recently figured at a great way to both secure my previews AND allow my buyers to see the entire product.
Here’s a tutorial on what I do to provide a completely secure preview:
Note: Some steps might differ depending on the version of PowerPoint you use.
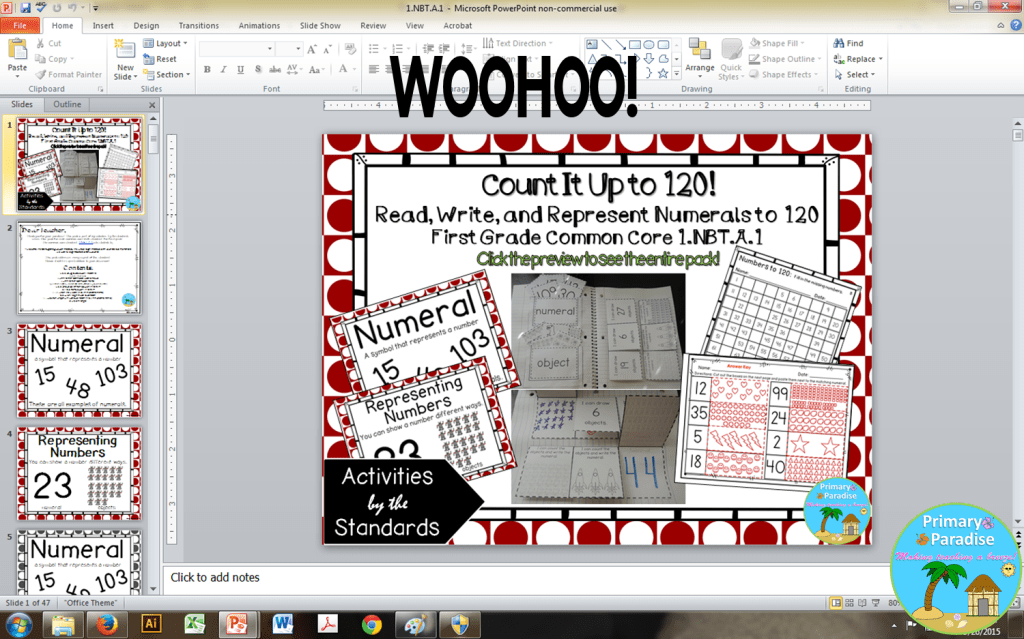
First things first. You’ll need to complete your product. I’m using a recent Activities by the Standards Pack as an example. Make sure to save a copy of your product BEFORE starting to create your preview.
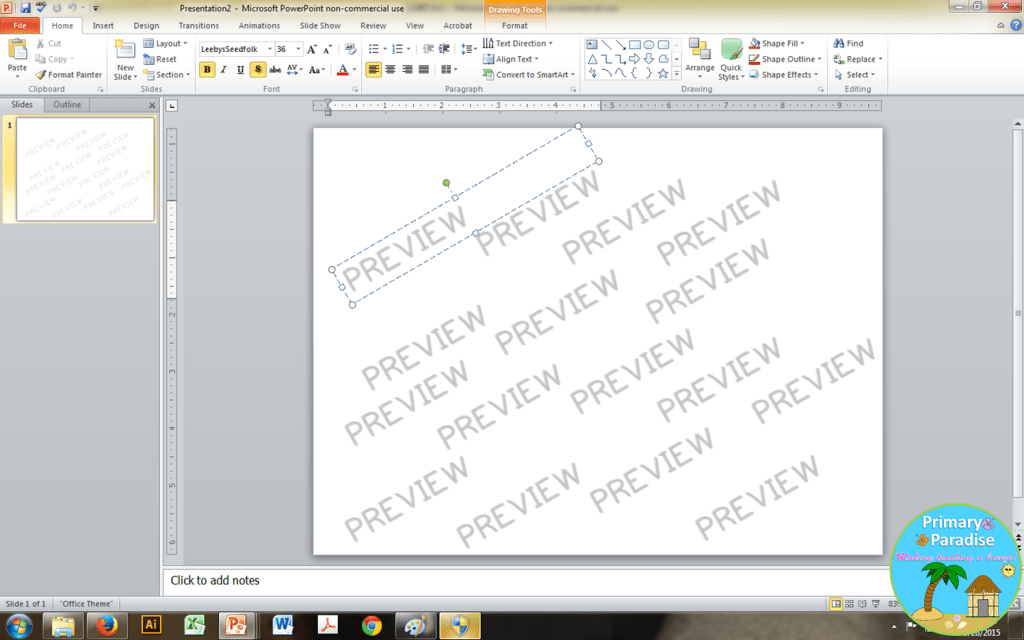
Once your product is complete, create a new PowerPoint presentation and write the words “Preview” throughout the WHOLE page. (I personally make my words slightly transparent, but that’s not required.) I recommend saving this PowerPoint so you don’t have to redo this every time.
**By request, click here to download the above page.**
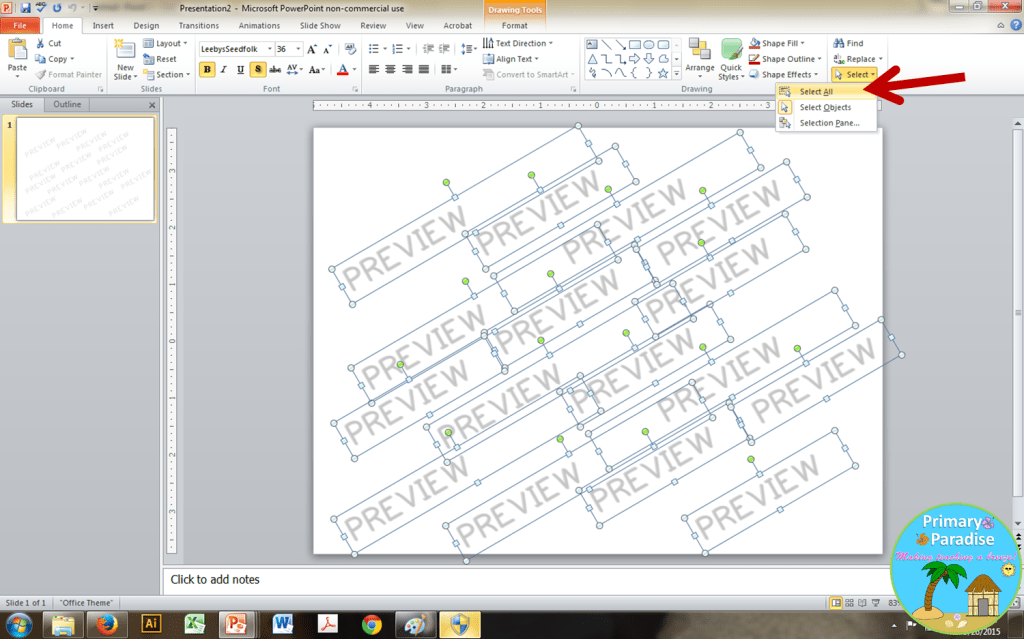
Click on “select all” so all of your previews are highlighted.
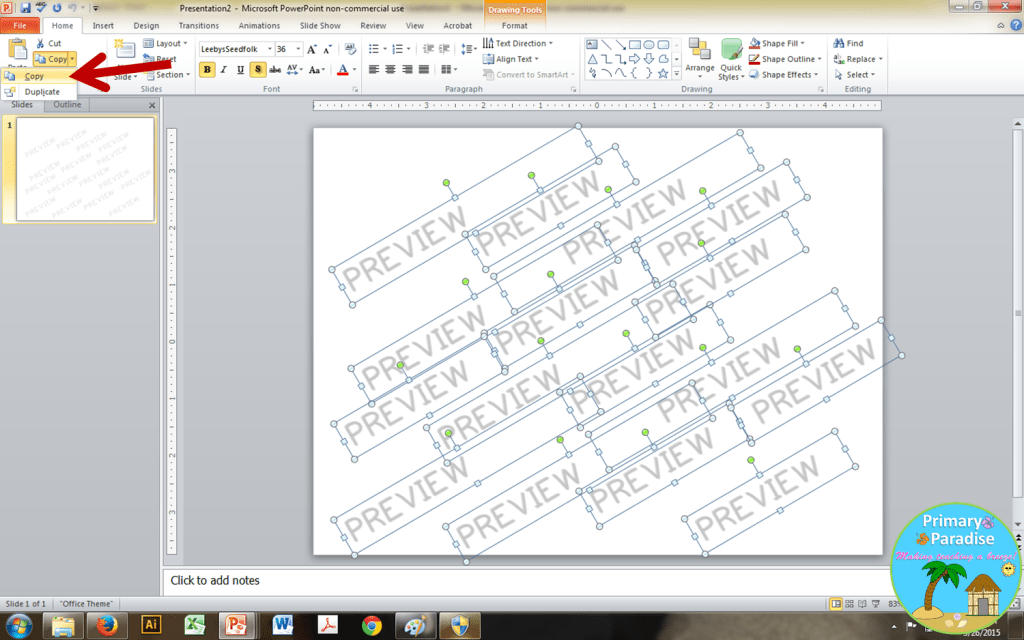
Click on copy (or just control +c).
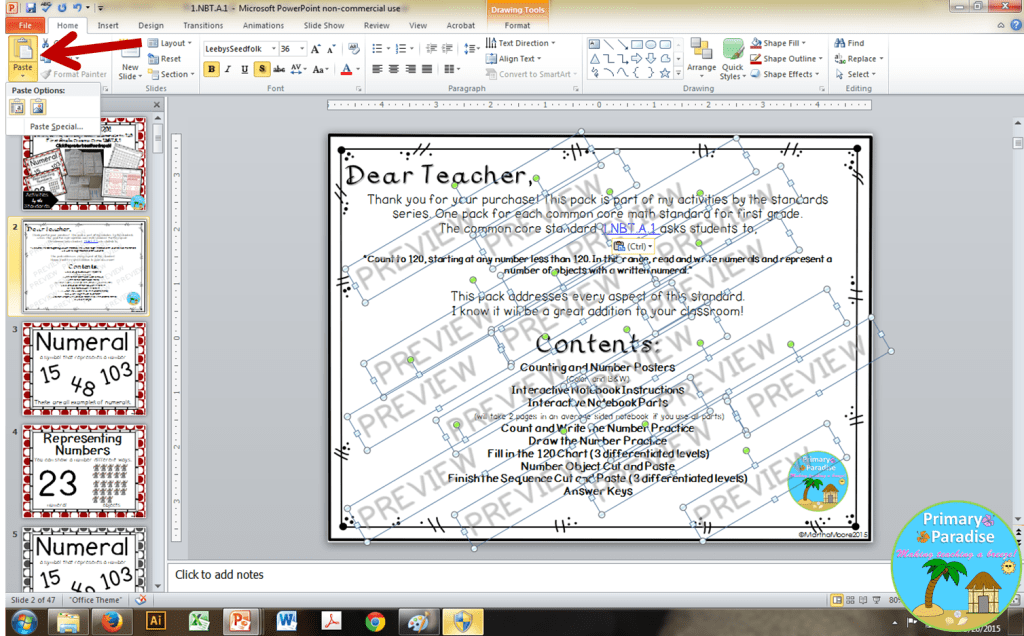
Go back to your finished product and click paste (or control + v) on the second page, and then continue clicking on each slide and pasting the words “preview” on each slide. I don’t put the words preview over the cover page or the credits page, personally.
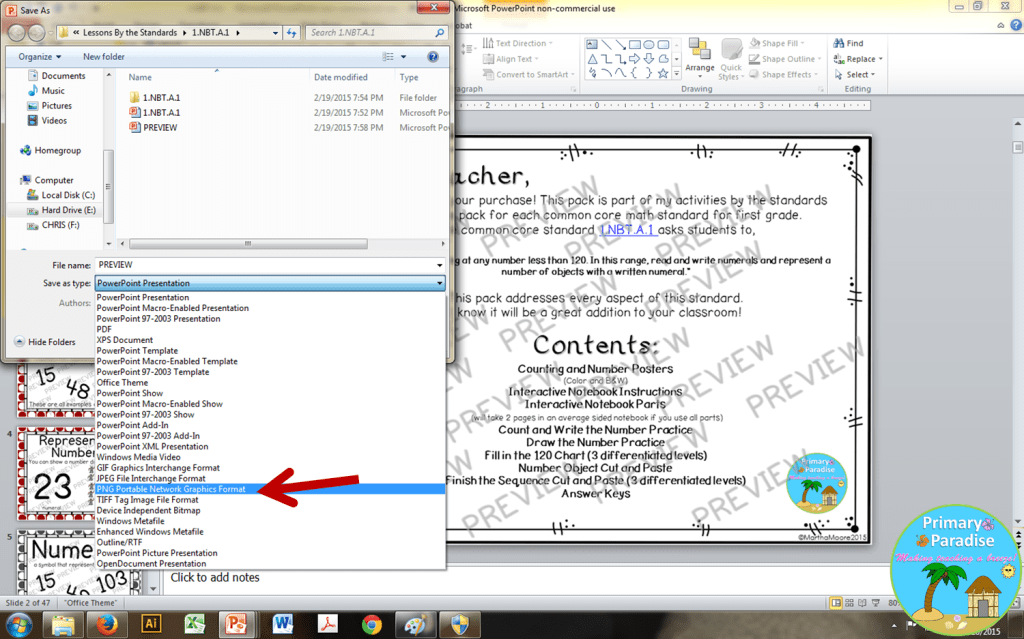
Once you’ve pasted “preview” on each slide, go to “save as” and save the presentation as PNG (you could also choose JPEG).
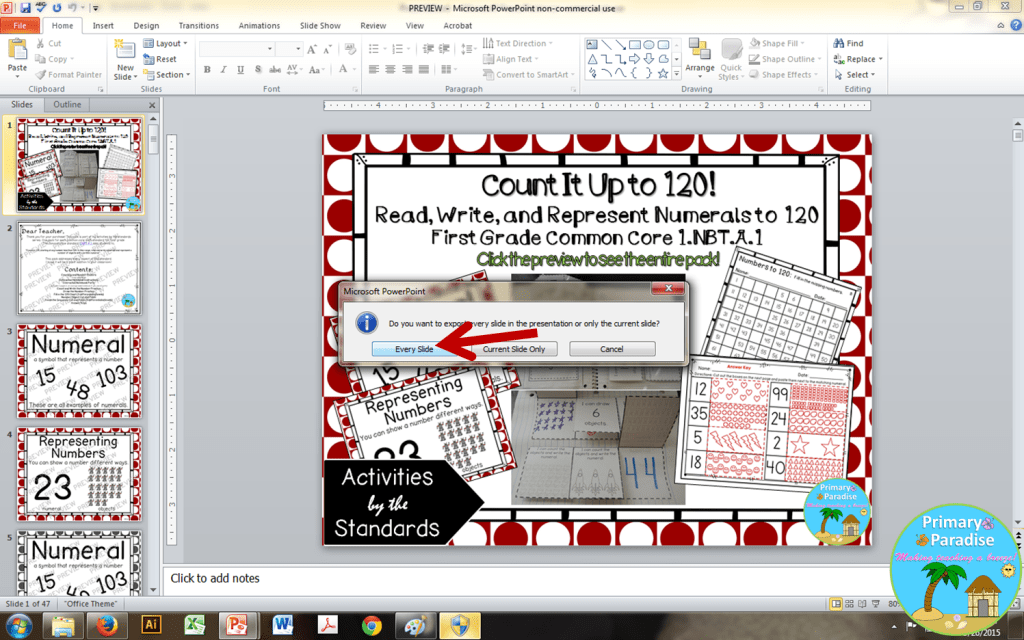
You want to select “Every Slide”. This will save each slide as a PNG picture in a folder. At this point, I also like to save the slideshow. Make sure to change the name so you don’t save over your original product. I typically just add PREVIEW to the end of the file name.
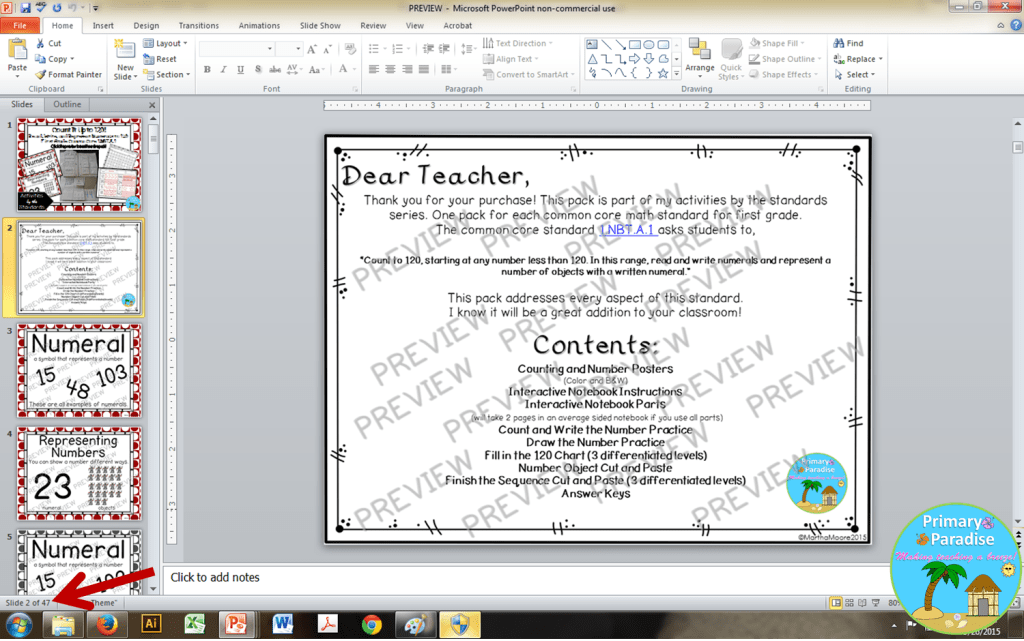
In the lower left corner, it shows you how many pages are in your slide show (mine has 47). Next, delete ALL of the slides except for the cover and credits page.
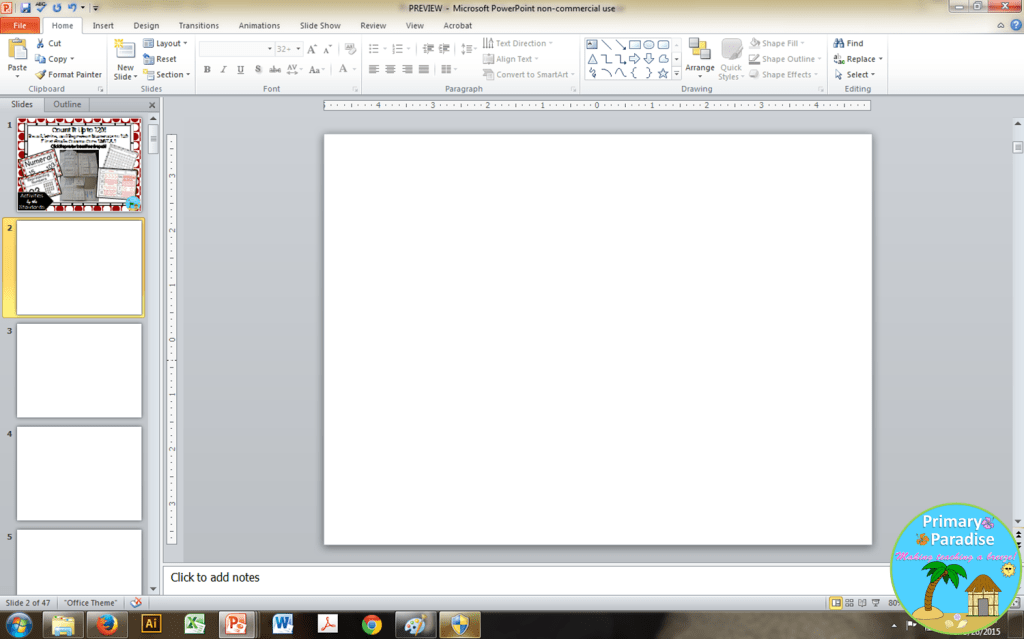
Then, create a blank slide, and then copy and paste until you have the correct number of pages (in my case, 47).
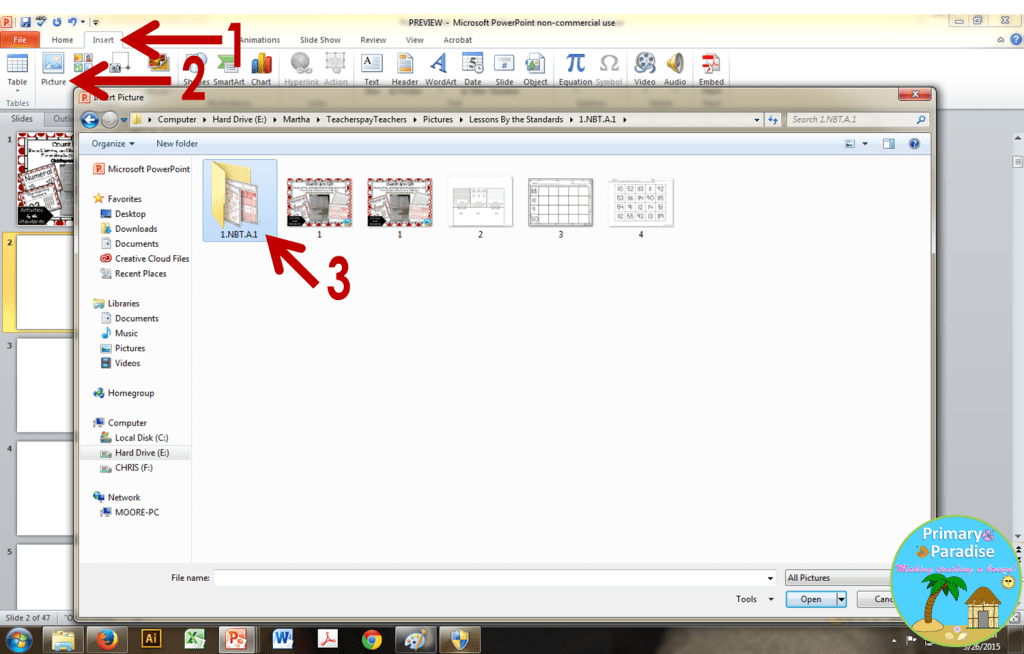
Click on the 2nd slide, and then click on “Insert” then “Picture”. Go to the folder where you saved each slide as a PNG image and click on the folder.
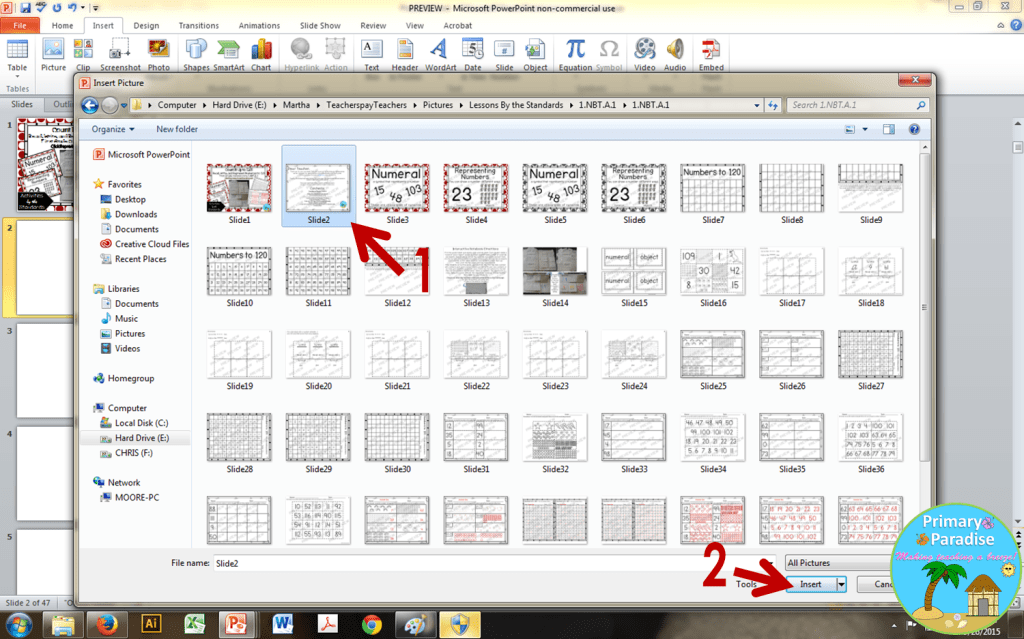
You’re on slide 2, so you’ll click on slide 2 and then click “Insert”.
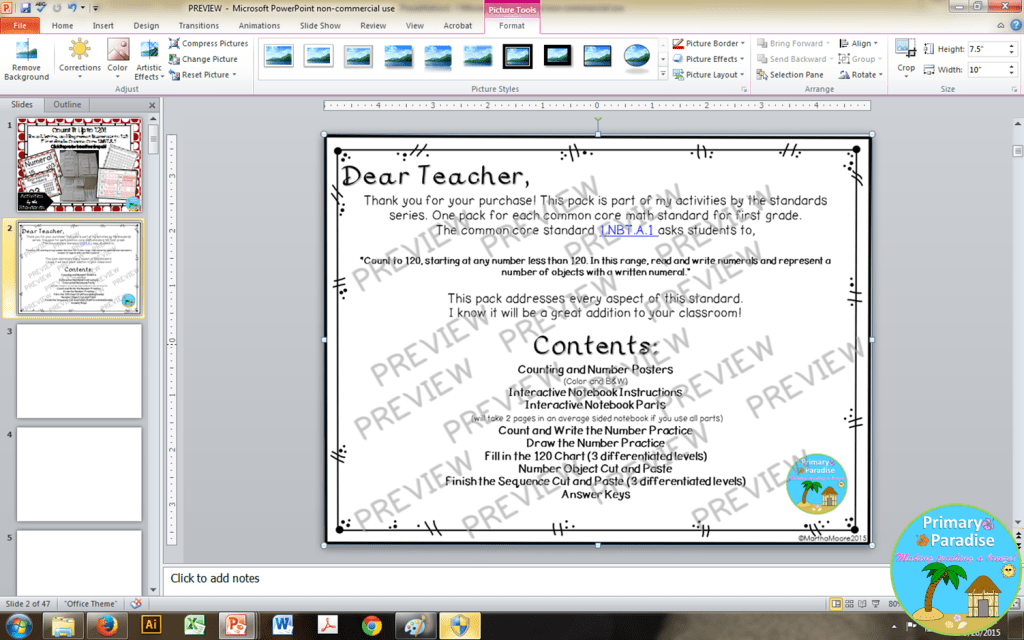
It will paste directly on top of the slide. You won’t need to move it or resize it. Now, repeat with the rest of your slides.
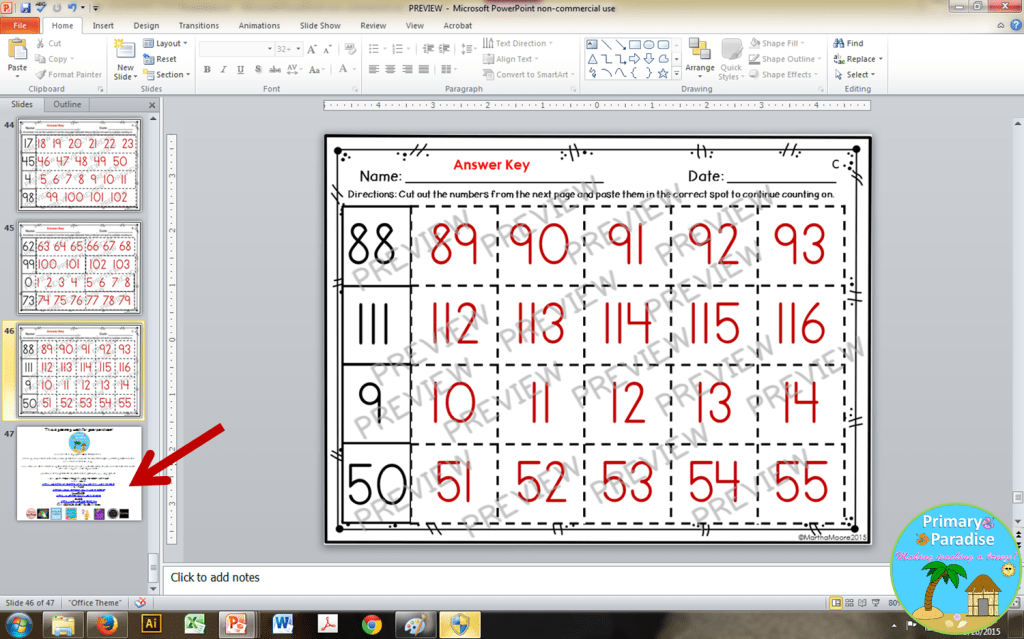
When you get to the last slide before the credits page, you’re done! I leave the credits page as is so the links are still clickable.
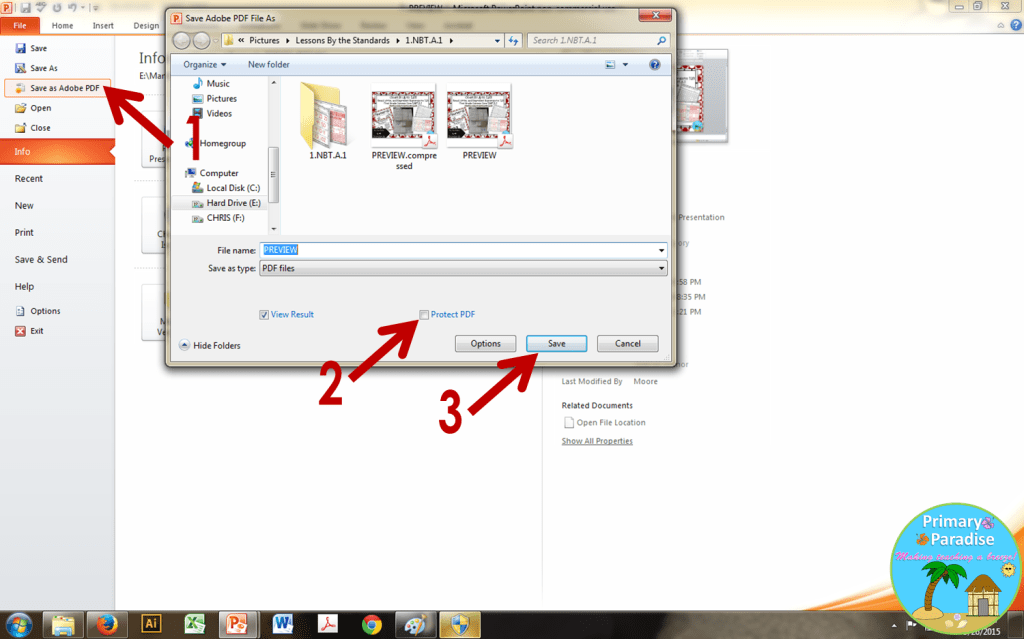
Next, you need to save your preview as a PDF. Click “save as PDF”. If you Adobe and can protect your PDF, I recommend still doing so, but it’s not necessary. I set mine PDF previews so they need a password to be edited, and printing is not allowed.
At this point, you could be done, depending on the size of your preview. It is now secure, but still allows your buyers to see the entire product. Even if someone tries to unlock the PDF, they will not be able to remove the “previews” from the picture, so it would be unusable.
Now, TpT limits preview files to 5MB or less, so if your file exceeds that, here’s what you do.
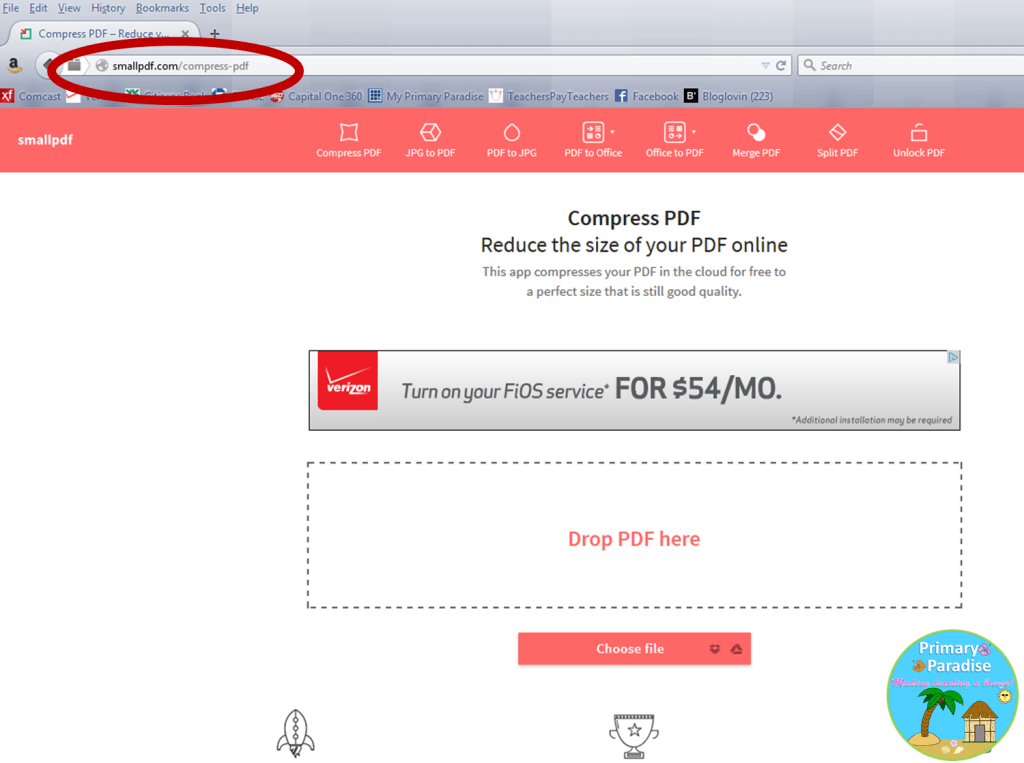
Go to smallPDF.com/compress-prf.
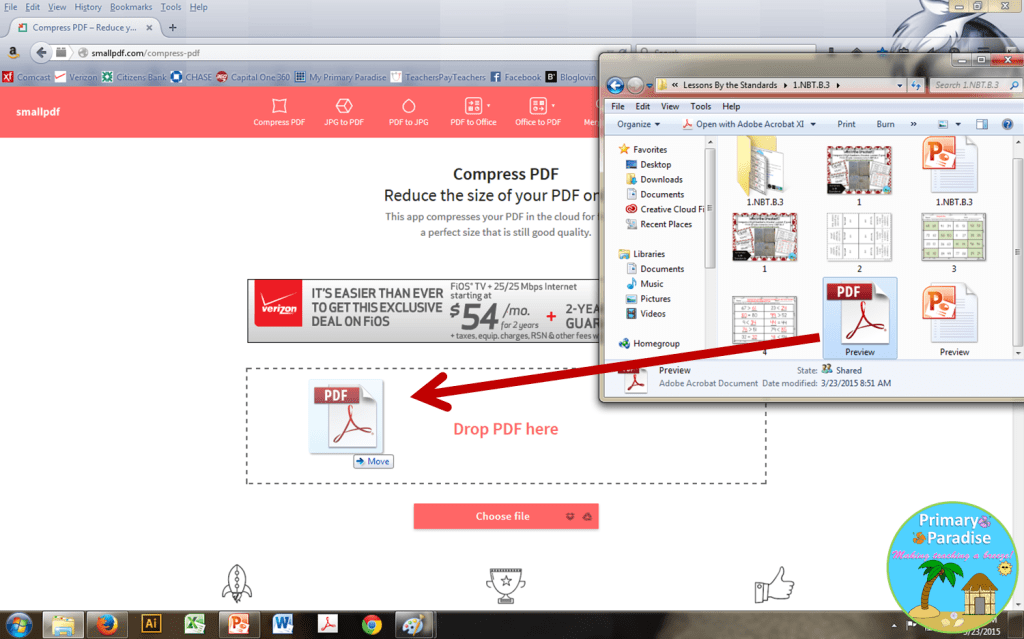
Simply drag and drop your file.
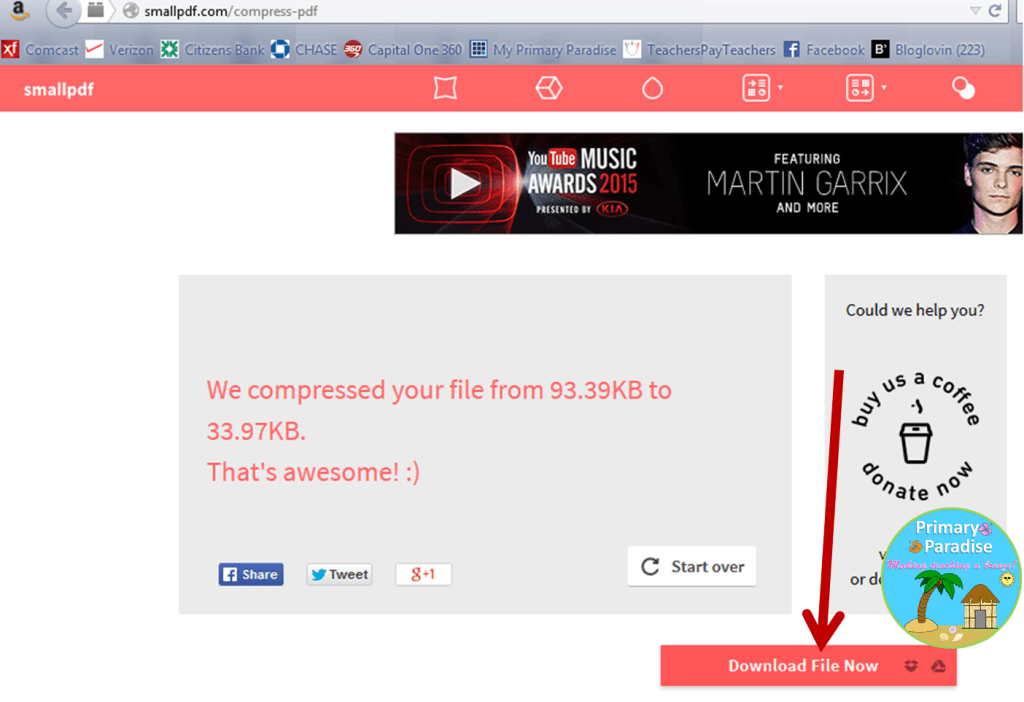
Once your PDF file is compressed, click Download File Now and save it. Notice, it tells you the size of your file. If your file is under 5mb, you won’t need the next step.
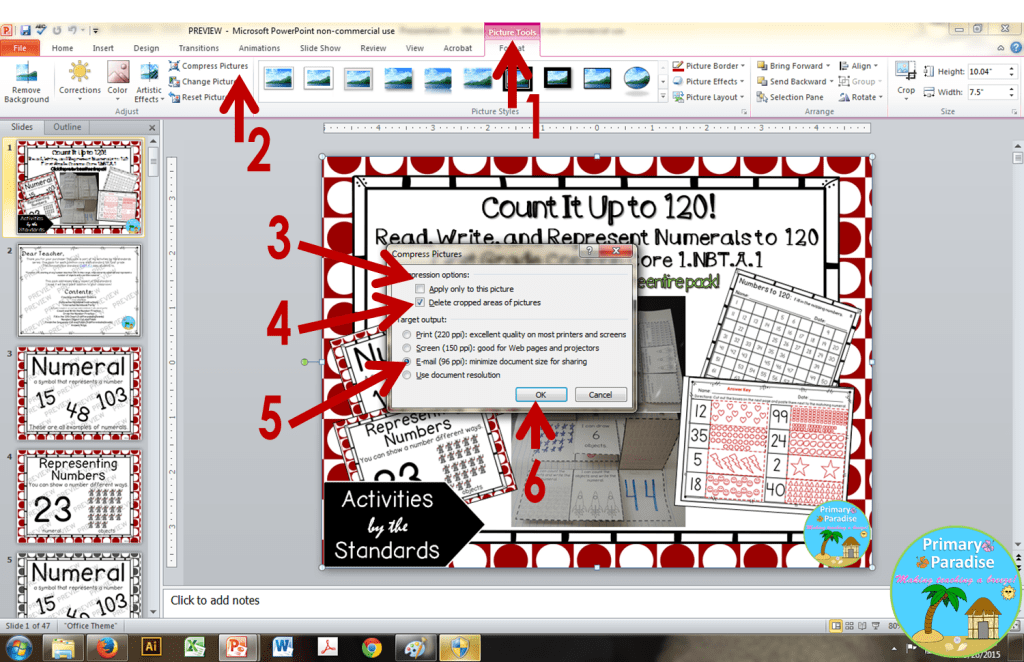
If your file is over 5mb, you will need to go back to your PowerPoint file. Click on any picture and then “Picture Tools” will pop up. Click on “Compress Pictures”. You want to uncheck “Apply only to this picture” and check “Delete cropped areas of pictures”. Then, select “Email” if you need to greatly reduce the size, or “Screeen” if you’re only off by a little. After doing that, save it as before and THEN go back to smallpdf.com and compress the new file.

Last, you will upload your new, complete, and secured preview to your product page!
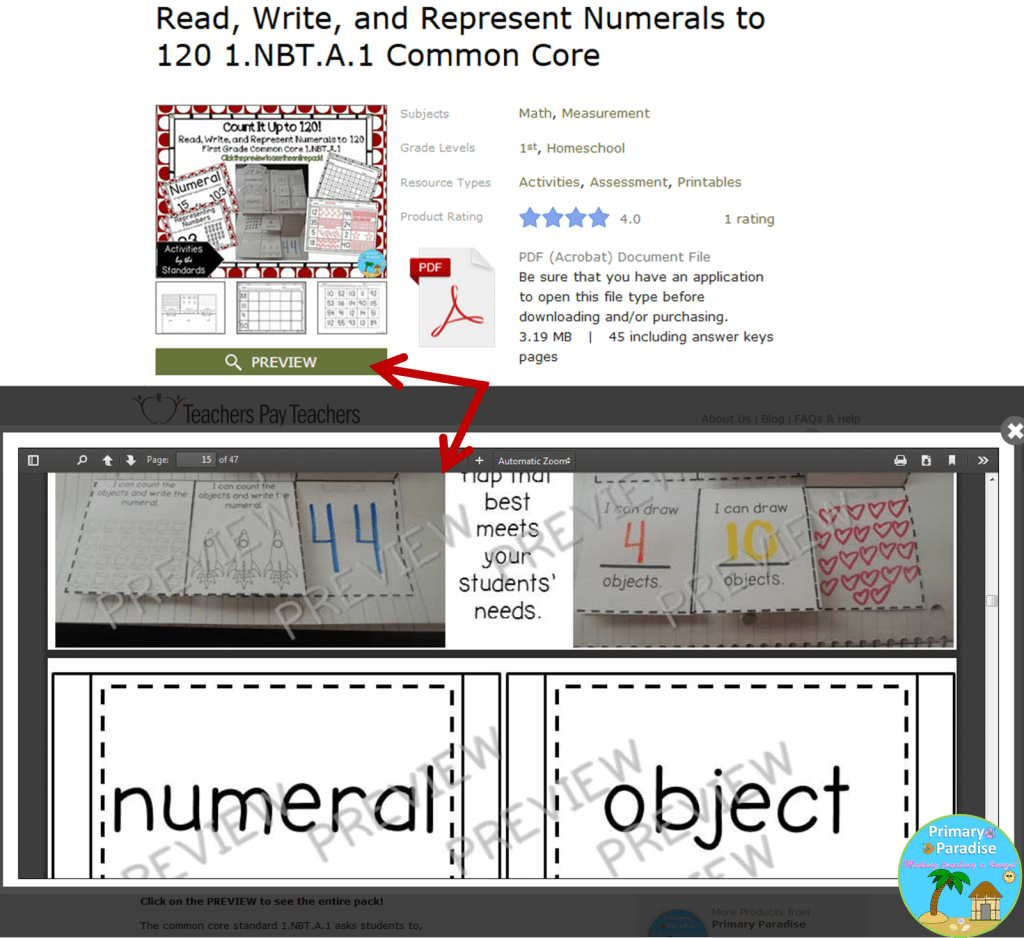
And now, when a buyer clicks on my the preview for my product, they see the entire thing which makes it easier for them to decide if they want to purchase it!
I hope that was helpful! Let me know if you have any questions!
